One of the least understood, yet most important aspects of your starting position is how to hold your ball. Really; holding your ball properly is a primary key toward consistency.
Think about it. You pick up the ball from the ball rack. You hold the ball in the stance. And, you hold the ball during the approach. There are specific considerations during each action that may enhance your safety, your accuracy and your score. So, let’s start at the beginning.
Picking the Ball Up
It isn’t unusual to find bowlers who retrieve their ball from the holding rack in a manner that threatens their safety and negatively affects their bowling. A simple technique allows you to avoid both negative aspects of picking up your ball.
Rolling Balls on the Rack – Prior too retrieve a ball from the holding rack, wait until all balls stop rolling. Many finger injuries occur when placing your hand into an area when a ball strikes the next stationary ball with the bowlers finger in between.
Two-Handed Ball Pick-Up Method – Once the ball stops rolling, face the pins from the side and pick up the ball with both hands, with one hand on each side of the ball rack; NEVER from the front or rear of the ball. Picking up the ball from the side will help you avoid crush injuries to hands and fingers, strain on the howling hand, and perspiration in the holes.
Avoiding Fatigue and Perspiration – Again, when picking up the ball, it is smart to use the two-handed method. Your fingers and will be less fatigued and reduce swelling of the fingers. Also, using the two-handed method of picking up the ball during bowling, prevents excessive perspiration in the holes and swelling of the fingers.
Holding the ball in the stance
There are a variety of ways bowlers hold their ball in their stance. Some bowlers hold the ball high (some even above their eye), some at waist level, and still others close to their thigh. Some bowlers, during their stance, position their ball in a way that varies from the textbook position. For serious bowlers, unorthodox styles are the exception, not the rule.
Uninformed bowlers normally deviate from the textbook style most often because they are searching for solutions to flawed results. Bowlers often introduce a technique to make up for other flaws. In the end, it complicates their game when they introduce one flaw to correct another.
Variations from the textbook position are useful when adjusting to changing lane conditions. It is prudent to begin from an established, well thought out, solid foundation. First learn the basics, and then the tricks of the trade; and never reverse that wisdom.
With that, let’s build a technique of holding your ball shown to result in more consistent bowling.
One of the most important factors in good bowling is timing. Good timing begins with a well-established stance and the proper vertical position of the ball.
If you were asked to hold your ball for a long period of time, you would end up bracing your elbows against your body, and raising your ball upward toward your upper chest next to your chin. That would place the majority of the weight directly on your body and not your arms. The larger muscles of the body would carry the weight. That minimizes the stress on your arms and maximizes the time you could hold the ball.
In determining up your vertical ball position in the stance, while maintaining your bowling elbow against your body, you would lower the ball into your desired position. The vertical ball position is a key factor in good timing.
The elbow does not move; only the forearm. This action provides a consistent positioning of your bowling arm. When your ball is in the desired vertical position, your elbow should be directly by, and against, your side.
Using Vertical Ball Position
Textbook ball position finds the elbows resting close to the hips. The ball is nested in the ball-side palm, and supported by the non-ball-side hand about waist high and slightly right of the center of the body for right-handed bowlers (opposite for left-handed bowlers). Use a soft pushaway and completely relax all muscles to allow the ball to descend by gravity on its own weight into the swing. Maintain a comfortable ball position before the pushaway. The placement of the ball must permit an easy, undeterred pushaway.
Using Ball Position to Affect Timing
Good timing occurs when the feet move in coordination with the arm swing. Coordinated timing of the feet and arm swing can be adjusted by raising or lowering the ball in the stance.
One factor in determining the vertical position of the ball it the bowler’s physical makeup. A bowler’s body height and arm length affects how a bowler determines ball height in the stance, as will matching a bowler’s energy level. The taller the bowler, generally speaking, the lower the ball in the stance is required to achieve the same ball swing.
The higher the ball begins in the stance, the more distance the ball travels, and the more time required to complete the swing of the ball. This longer swing time complements a slower foot tempo to complete the steps of the backswing.
Adjusting the vertical ball position in the stance can also affect ball speed, and is the subject of another discussion.

The technique of raising or lowering the ball in the stance helps bowlers synchronize their arm swing with their feet tempo.
It should be remembered that the length of the arm, to a degree, determines the time period available during the steps of their backswing. The lower the ball is placed in the stance, the more there is a tendency to raise the backswing height, because the ball will have less distance to travel to reach the optimum height.
It has been demonstrated that there is also a tendency for the bowler to move their feet faster as the vertical ball position is lowered, and cause the speed of the ball to be faster. We’ll address this consideration later.
So, the bowler should begin with a medium tempo. A medium tempo results from the ball placed horizontally and parallel to the lane surface in the stance.
If slower feet tempo is required, the ball position in the stance should be raised above the level of the lane.
Likewise, if faster feet tempo is called for, the vertical ball position in the stance should be lowered.
B all Position (side)
Center the ball between the center of your body and the ball-side shoulder. Placing the ball outside and in front of the shoulder places undue stress on the bowling arm, resulting in tiring, balance issues and inconsistency.
Consistency begins with a balanced position, and proceeds all the way through the approach.
Your upper arm should rest against your side, and the non-all side hand should hold the large majority of the ball weight. It would be difficult to ask you to have a free arm swing, and then ask you to hold the weight of the ball with your bowling arm. You do not want the bowling arm muscles to be tense if you want a free arm swing. Therefore, you don’t want it to start in a state of tension.
As you begin a free (tensionless) push-away, your arm tension would be forced to change as the ball swing begins. Changing of arm tension creates a state of muscle confusion, and should be avoided. You want to develop consistency, not inconsistency. In order to keep the bowling arm relaxed, you want it to be relaxed from the beginning, and remain relaxed as the ball swing proceeds up to the release point.
The ball weight is transferred from the non-bowling hand to the bowling hand toward end of the extension of the arm and push-away as the body weight is transferred to the bowling-side foot. This is true regardless of whether you take four, five or more steps. This transfer should be practiced until you are comfortable with the smooth synchronizing of the weight transfer of both the ball and the foot. This is a basic key toward consistent timing.
If you don’t feel a simultaneous ball weight transfer to the bowling hand at the same time the ball-side foot is placed on the approach, you can stop the approach and begin again instead of continuing with an errant approach.
Holding The Ball During the Approach
Wow! with the multitude of ball swing techniques used by bowlers, it may best serve us to focus more on this element during the Ball Swingdiscussions in the Bowler/Approach Section.
 For now, let’s focus on just a few basic considerations at this point.
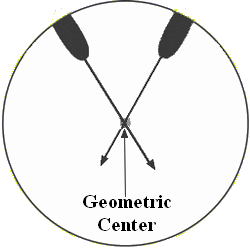
First, when the gripping holes are drilled, both point roughly toward the center of the ball with only slight pitch variations.
The geometric wedge formed by the gripping holes places friction on the fingers whenever the thumb points toward or away from the body. Conversely, when the thumb is placed forward, thumb-to-ball friction is minimized.
When a ball is properly fitted to the hand, the finger and thumb pressure holds the ball with minimal gripping pressure as long as the thumb points toward or away from the body. And the thumb-to-ball friction is minimized as the thumb is pointing toward the direction of the ball movement.
The point of this is one key to holding the ball during the approach. Maintain your hand (thumb) position away from the body during the swing, and then, as the ball passes the leg during the last portion of the ball swing, rotate the wrist until the thumb is pointing toward the direction of the ball travel, and the ball will roll off the thumb as you near the release point. If the ball “hangs” onto the hand during release, the first suspect is how you are holding the ball during release.

Holding on is being strong,
but
Working with the ball makes you smarter!
![]()